
Two days ago I got the TB6560 stepper controller board with nema 23 motors and power supply for my new CNC router. First of all, don't buy such a TB6560 board from ebay if you want a out of the box, perfectly working controller. Take a look here what you may have to do, to make it work well. Also take care, my board may differ from yours, there are several different around. I accept no responsibility for any kind of damage! Ask first before you hurt yourself or damage your hardware.
| The Guide, the vendor sent to me wasn't very helpful. Nevertheless there is some important information. |
| ||
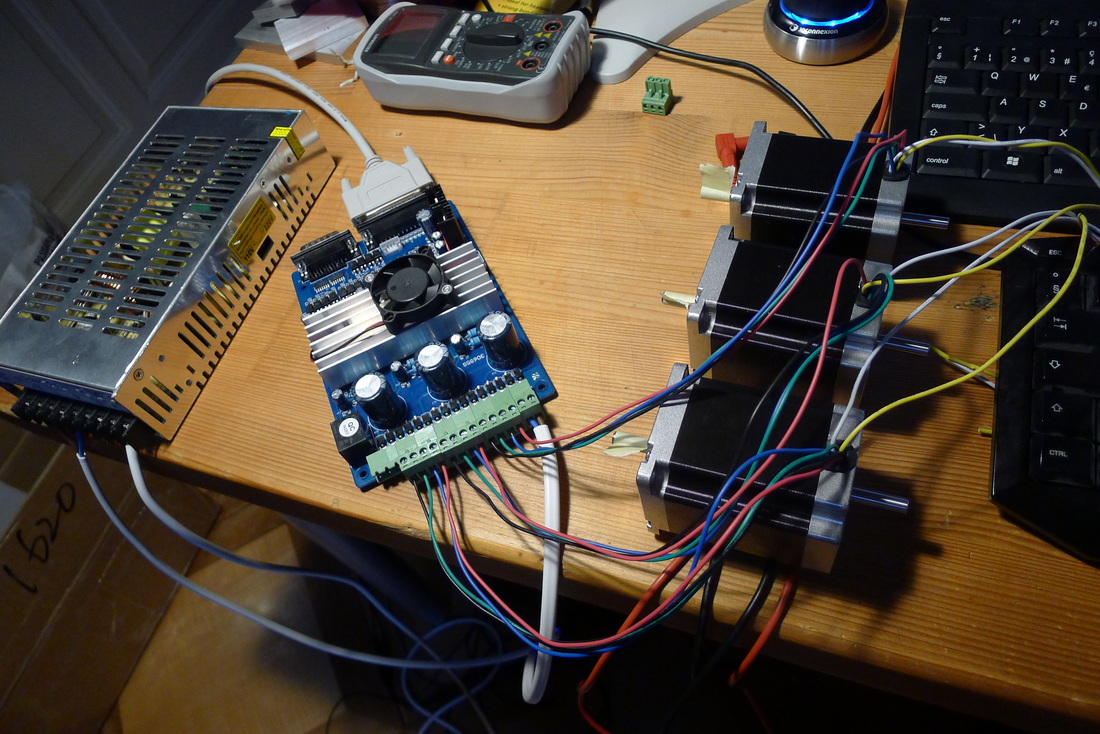
First connect the power supply to your local net. The colors of the cable may differ. Search the web for your country's color code. Make sure the power supply is switched to the correct input voltage. In my case 230V. Then power it up and check the output voltage on the +/- clamps. Take care, the clamps on the right side now have dangerous voltage! For nema 23 motors there is a voltage between 16 and 24V recommended. The voltage can be fine tuned with the potentiometer on the left of the clamps. Watch out, the controller board may blow up if you use voltages near 36V which should be possible according to the product description. Search the web for help with this. When you are done, connect the controller board to the power supply according the images. + on the outer side (brown) and - on the inner side (blue).
As they sent me stepper motors with 6 wires, I had to take a look at the datasheet. The white and yellow cables are on the middle of the coil and not used in my case. After this, take a look which cables make a pair. For my motors it is blue/red and black/green. Connect them to one of the four pin connectors. It doesn't matter if you switch the blue with the red or black with green but they have to make a pair on the connector. To go the safe way, I used 25% current on the dip switches (1&2 off). Never connect or disconnect a stepper motor to a powered stepper driver or you may burn it!
Now it's time to install Mach3. I strongly recommend to read the Mach3 manual or at least some parts of it. Follow the instructions on the manual to install Mach3. You MUST restart your computer after installation. Make sure the driver works correctly with the drivertest.exe, as described in the manual. When everything is ok, start Mach3 mill and go to Config->Ports and Pins. On the images you can see the pin setup which worked for me.
Now double check if you wired everything correctly. Against the description of the TB6560 board, it possibly won't protect your computer from damage in case of an error. Then connect the controller board to your computer. Power up your power supply and hit the reset button on Mach3. When you hit one of your arrow keys on your keyboard, the motor should move (arrow keys for X/Y movement, page up/down for Z movement), or you should at least hear some noise. If the motor just moves a bit and then make noise, the speed is possibly too high. Or in other words it receives too many pulses per second. You can press tab and change your speed (to 10% or anything else) to check if the pulse rate was too high. If the motor is turning, connect your motor to the other axis. Don't forget to turn off power before you disconnect/connect anything! If all axis are working more or less, I recommend you go through the motor setup part of the Mach3 manual to make your motors work correctly.
I hope this rough guide will help someone to make his TB6560 board work. Don't hesistate to contact me if you have a question, or I made a mistake.
 RSS Feed
